There are dozens of ways of making a sling. From a simple overlap made from anything to elaborate braiding methods. Traditional materials – hemp, pita, horse hair, grass, stinging nettle, wool, cotton – to modern materials, such as nylon or polypropylene (parachute cord).
My preferred slings have always been the simple, cheap, sturdy and fast-to-make ones, made from modern string. Why? Two reasons: Natural fibres wear out quite fast – probably lasting up to 500 shots. The wear and tear exerted by stones rubbing the pouch and release cord at 60 m/s is enormous. So, polypropylene it is!
Of all these, my twisted polypropylene honda with a duct tape-reinforced pouch is king!
And it literally takes no more then 15-20 minutes to make one!
All you need is a 3 mm (0.12″) nylon string. Thinner string is possible, but not comfortable; thicker string drags a lot when you rotate it.
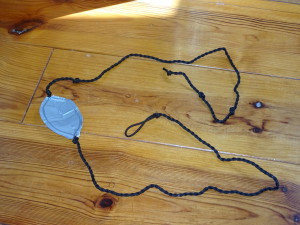
For a “regular” length (see the “sling summary” pages) cut 5 – 6 arm lengths worth of string off. On the ground, the future honda looks like this:
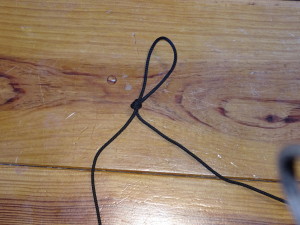
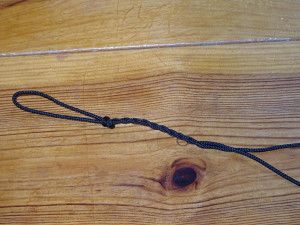
Now, first of all, you need to do the loops for holding the honda. In my case, then, for the “inward” or Ibiza grip, which anchors the honda on the little finger (it anchors the stone weight to the entire hand, keeping it steady even with stones over 150 grams (5 ounces)).
This is the starting loop:
And this is how it is held:
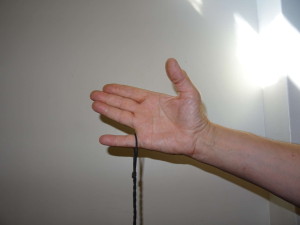
I place the knot so that it rests in the small cavity where index and ring finger meet – purely for comfort:
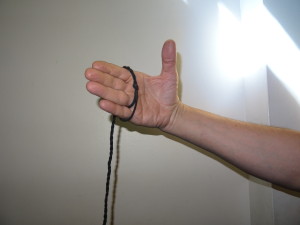
As you can see, the honda is anchored to the hand, which gives you a very powerful grip.
Next step, you produce the first strand up to the pouch. Strictly speaking, you could just use the two strings as they are, but that’s make for an awkward handling, lots of tangling, less stability, more time to unfold and so on and so forth. In short, instead of a sling, you get a messy, unusable yarn ball.
To produce the first strand, you do exactly what you do when making cordage from fibers – you twist each of the two strands between thumb and index finger in one direction (e.g. to the right), and roll the two strings one over the other in the opposite direction (e.g. left). This way, the torsion (tension) of the two twists (in each of the strings and the two strands together) keeps the combined sling strand from opening.
As by US Army survival handbook, the technique looks like this:
Here is a picture of the sling strand evolving towards the pouch:
Once you come to the pouch – as said, my slings reach from the fingertips to my shoulder muscle; this makes for a good handling length with regard to my body size -, so, once you get at the pouch, you fix the sling strand by tying a knot into it. The same you do on the other side of the pouch segment, where you start the release string. The result looks like this:
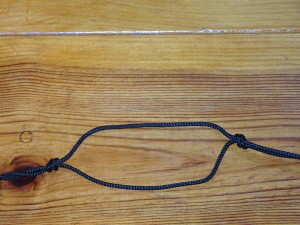
Small tip: Don’t make the pouch segment too small. I use as a standard “knot-to-knot” distance 12-14 cm (4.7 – 5.5”). It is a nice “all-in-one” size which throws a 150 gram (5 ounces) stone as nicely as a lead bullet or a spark plug.
Now you continue braiding the release strand for another ten minutes until you reach the end of the release honda strand. I always produce around 4 inches more twisted strand, to have space for some luxury:
- a knot just off the pouch on the release string, about 2.5 cm / 1” from the pouch.
Why? Because this make the release string “fall away” from the pouch faster when you release, increasing precision and reducing any “hooking” or drag on the projectile - a holding knot I can clamp with my thumb when I close the hand over the release string
- an adjustment knot just 10 cms / 4” inside from the holding knot on the release string. Just in case the balance of the strings changes over time, as they settle due to the forces exerted through use
- and an end knot, to tie the sling up nicely.
The short end pieces of each string I melt by holding them over a flame for some seconds. I also tend to melt the end knot tight the same way. Not needed, but adds stability.
That’s it. Finally, to finalise the set-up, originally I wrapped some stiff (jeans) cloth around the pouch strings and sew it up:
Now, I simply use duct tape (you can btw see the knot on the release strand, to the right – the one which helps the honda to open faster):
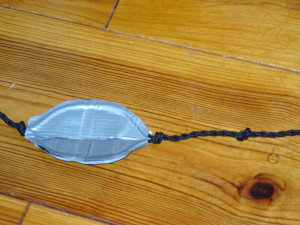
The length-wise cut in the tape makes the pouch adaptable to a variety of stone sizes.
Here is the total result:
This honda is sturdy, resistant, long-lived, supple, tangle-free, not bulky and can also be used for anything you need a strong string for. It’s in all the years I’m making slings about the best sling model I’ve ever made; it’s a perfect honda and has an unbeatable “return-on-investment”.
Total start-to-finish time, less than 30 minutes.
Loading it easily
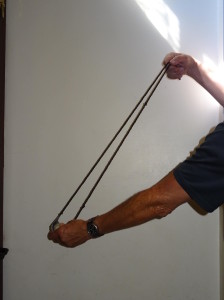
Now, however you hold the honda, to load and shoot the honda in a smooth movement, raise your right (shooting) hand into the air, with the holding strand attached to the hand:

The honda pouch will be dangling in the air – literally.
Now, reach with your loading (left) hand for the pouch and grip it tight. Don’t let go!
Next – while keeping the pouch gripped with your free (left) hand – take a stone with you shooting (right) right hand. Place the ammo with the shooting (right) hand in the pouch – still held tightly with the free (left) hand – and grip both ammo and pouch with the thumb of your free (left) hand:
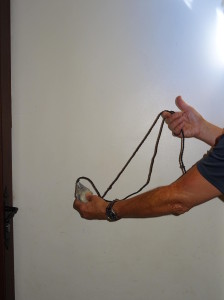
Remark: Place the stone (ammo) in a RIGHT ANGLE to the pouch. Never put it length-wise, a then it will tend to hook, with unpredictable results.
After having placed the ammo in the pouch and fixed it with the free (left) hand, grip the second – release – strand of the sling by placing it – with a swift “hook” move – over the index finger of your shooting (right) hand. You grip this strand where it starts at the pouch. So far, this strand has been dangling around; it normally poses no problem, save when you are moving fast.
Once you have both strands in your shooting (right) hand, tense the honda by extending your arms. The release strand will slip between the thumb and index finger of your shooting (right) hand until you can grip the release knot at its end.
So, your shooting (right) hand holds the honda fixed strand by the loop; the free (left) hand holds the pouch & ammo:
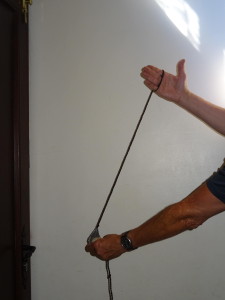
Now you have the honda stretched – left hand tensing the pouch, right hand tensing the strands.
Now, you’re ready to shoot! Just rotate and let go (in the right direction!).
Enjoy!